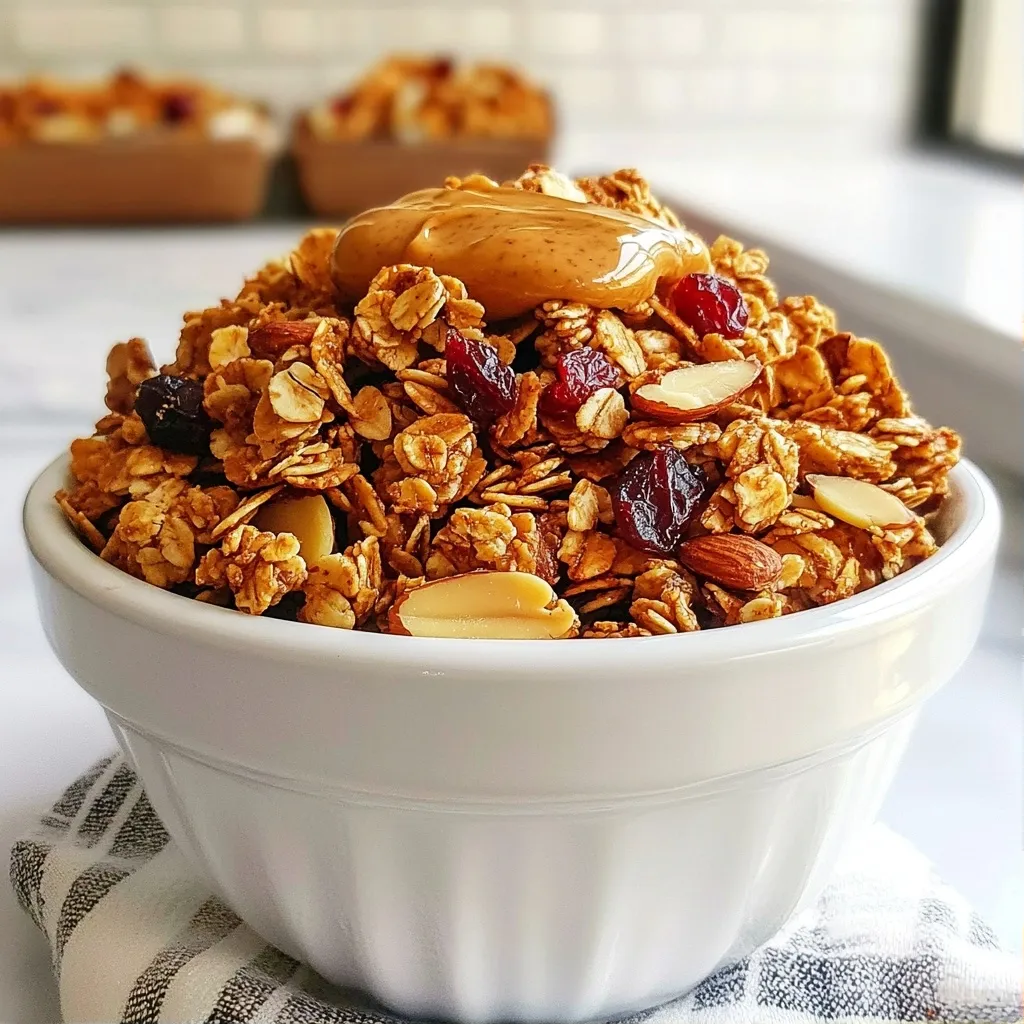
Looking for a quick and tasty breakfast? My Crunchy Quick Breakfast Almond Butter Granola recipe is your solution! Packed with wholesome ingredients, it combines the rich flavors of almond butter and a hint of cinnamon. This granola is crunchy, easy to make, and perfect for busy mornings. Get ready to wake up to a breakfast that fuels your day! Let's dive into the simple steps to create your new favorite morning treat.
Why I Love This Recipe
- Quick and Easy: This granola recipe takes just 10 minutes of prep time, making it a perfect choice for busy mornings.
- Healthy Ingredients: Made with wholesome oats, nuts, and natural sweeteners, this granola is a nutritious way to start your day.
- Customizable: You can easily modify this recipe by adding your favorite fruits, nuts, or seeds for a personal touch.
- Great for Meal Prep: This granola stores well, allowing you to prepare a batch ahead of time for quick breakfasts throughout the week.
Ingredients
To make Crunchy Quick Breakfast Almond Butter Granola, you need simple and wholesome ingredients. Here’s what you will gather:
- 2 cups rolled oats
- 1 cup almonds, roughly chopped
- 1/2 cup almond butter
- 1/4 cup honey or maple syrup
- 1/4 cup coconut oil, melted
- 1/2 teaspoon cinnamon
- 1/4 teaspoon salt
- Optional: 1/2 cup dried cranberries or raisins
- Optional: 1/4 cup dark chocolate chips
These ingredients blend to create a tasty and crunchy granola. Each one plays a role in flavor and texture. Rolled oats provide a hearty base. Chopped almonds add crunch and healthy fats. Almond butter gives richness and creaminess. Honey or maple syrup adds natural sweetness. Coconut oil helps with binding and adds flavor. Cinnamon gives warmth and a hint of spice. Salt balances the sweetness.
Feel free to add dried fruits or chocolate chips for extra fun. They enhance the taste and add a nice chewy texture. You can adjust the sweetness too. Use more or less honey or maple syrup based on your liking.
Step-by-Step Instructions
Preheat the Oven
First, you need to preheat your oven to 350°F (175°C). This step is key to getting that nice crunch. While the oven heats up, line a large baking sheet with parchment paper. This makes cleanup easy.
Mix the Dry Ingredients
In a big bowl, combine 2 cups of rolled oats and 1 cup of roughly chopped almonds. This mix gives your granola a great base. Make sure to stir them together well. You want every bit to be ready for the next step.
Prepare the Almond Butter Mixture
In a separate bowl, mix 1/2 cup of almond butter, 1/4 cup of honey or maple syrup, and 1/4 cup of melted coconut oil. Add 1/2 teaspoon of cinnamon and 1/4 teaspoon of salt. Stir until everything is smooth. This mixture adds rich flavor and helps bind your granola.
Combine Ingredients
Now, pour the almond butter mix over the oats and almonds. Use a spatula to stir everything together. Make sure all the oats and nuts are coated well. This step is crucial for even flavor.
Bake the Granola
Spread the granola mixture evenly on the prepared baking sheet. Bake it for 15 to 20 minutes. Stir halfway through to ensure it gets golden brown all over. Keep an eye on it to avoid burning. You want it fragrant and crisp.
Cool and Add Optional Ingredients
Once baked, remove the granola from the oven and let it cool completely. It will get crunchier as it cools. After cooling, stir in 1/2 cup of dried cranberries or raisins, and 1/4 cup of dark chocolate chips if you want. Store the granola in an airtight container. It stays fresh for up to two weeks. Enjoy it in bowls with yogurt or milk!
Tips & Tricks
How to Achieve the Perfect Crunch
To get that perfect crunch, you need to bake the granola just right. First, make sure to spread the mixture evenly on your baking sheet. This helps it cook evenly. Stir it halfway through baking to avoid burning. Keep an eye on the color. Once it turns golden brown, it's done! After baking, let it cool completely. This step is key, as it makes the granola crispier.
Storing for Freshness
Storing your granola properly keeps it fresh and crunchy. Use an airtight container to protect it from moisture. This way, it lasts for up to two weeks. You can also keep it in the fridge for extra freshness. Just make sure to let it come to room temperature before eating. If you want to keep it longer, consider freezing it. Just remember to thaw it before enjoying.
Customizing Sweetness and Flavor
You can easily change the sweetness and flavor of your granola. If you like it sweeter, add more honey or maple syrup. For less sweetness, use just a bit. You can also mix in spices like nutmeg or ginger for a different taste. Want a nutty flavor? Try adding peanut butter along with almond butter. Feel free to experiment and find your perfect mix!
Pro Tips
- Storage Tip: To keep your granola fresh and crunchy, store it in an airtight container in a cool, dry place. Avoid exposure to moisture.
- Customization Tip: Feel free to mix in your favorite nuts, seeds, or spices to personalize your granola blend. Consider adding pumpkin seeds or sunflower seeds for added crunch.
- Sweetness Adjustment: If you prefer your granola less sweet, you can reduce the amount of honey or maple syrup by half, or substitute with a sugar-free sweetener.
- Serving Suggestion: For a delightful breakfast, serve your granola with yogurt and top it with fresh fruits like berries or banana slices for added nutrition and flavor.
Variations
Add Different Nuts or Seeds
You can change the nuts or seeds in this recipe. Try walnuts, pecans, or sunflower seeds. Each will give a unique taste. You can mix and match to find your favorite. Just keep the total amount the same. This way, you maintain the crunch.
Use Alternative Sweeteners
If you want to skip honey or maple syrup, try agave syrup or brown rice syrup. You can also use coconut sugar for a different flavor. Each sweetener will change the taste and texture, but it will still be yummy. Adjust the amount based on your sweetness preference.
Incorporate Different Dried Fruits
Dried fruits add flavor and chewiness. You can use dried apricots, figs, or even banana chips. Mix these in after baking for a fresh bite. Feel free to get creative with your choices. Just remember to chop larger pieces into smaller bits for easy eating.
Storage Info
Best Practices for Storage
To keep your granola fresh, store it in an airtight container. This will prevent moisture from making it soggy. Glass jars work well, but plastic containers are easy to use. Make sure it’s in a cool, dry place away from sunlight.
Shelf Life of Granola
When stored properly, your granola can last up to two weeks. After that, it may lose its crunch and flavor. If you see any signs of spoilage, like an off smell, it’s best to throw it away.
Freezing Granola
You can freeze granola if you want to keep it longer. Use a freezer-safe bag or container. Granola can last up to three months in the freezer. When ready to eat, just thaw it in the fridge overnight. Enjoy your crunchy granola any time!
FAQs
Can I make this granola nut-free?
Yes, you can make this granola nut-free. Use seeds like sunflower or pumpkin seeds instead of nuts. You can also replace almond butter with sunflower seed butter. This option offers a similar taste and texture without the nuts.
How can I make a vegan version?
To make a vegan version, just swap honey for maple syrup. Maple syrup is a great vegan sweetener. Ensure that your almond butter is free from animal products as well. Most almond butters are vegan, but it's good to check.
What is the best way to serve almond butter granola?
The best way to serve almond butter granola is in a bowl. You can add yogurt or milk for a creamy touch. A drizzle of almond butter on top makes it extra special. Fresh fruit, like berries or banana slices, adds color and flavor.
Is it possible to make this recipe gluten-free?
Yes, you can easily make this recipe gluten-free. Just use certified gluten-free rolled oats. Most oats are processed in facilities that handle gluten, so look for specific labels. This ensures your granola is safe for those with gluten sensitivities.
This blog covers how to make delicious almond butter granola. We explored ingredients like rolled oats, chopped almonds, and sweeteners. I shared step-by-step instructions for mixing and baking. You learned tips for getting that perfect crunch and customizing flavors.
Granola is easy to store and lasts long. Remember, you can make it nut-free or vegan if needed. Enjoy creating your own healthy snacks!